Grove Beispiel
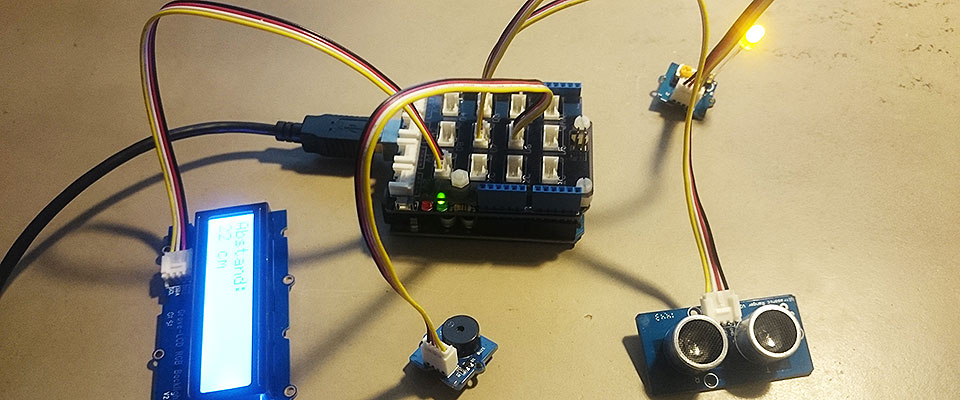
Mit einem Grove-Shield und den dazugehörigen Sensoren/Aktoren kann man super schnell physikalische Prototypen erstellen!
Code-Beispiel von „Grove_Ultransonic_Ranger_LCD.ino“
Arduino
/***************************************************************************/
//  Function: Measure the distance to obstacles in front and print the distance
//        value to the serial terminal.The measured distance is from
//        the range 0 to 600cm
//  Hardware: Grove - Ultrasonic Ranger
//  Arduino IDE: Arduino-1.0
/*****************************************************************************/

// https://github.com/Seeed-Studio/Grove_Ultrasonic_Ranger
#include "Ultrasonic.h"

// Anschluss des Ultrasonic Sensors auf D7
Ultrasonic ultrasonic(7);

// die LED
int pinLed = 3;

// Buzzer
int speakerPin = 6;

// Maximalabstand in cm, ab dann geht LED an
int maxAbstand = 60;

void setup() {
  Serial.begin(9600);  // Open serial port

  // LED zum Anzeigen, wenn man nah genug ist
  pinMode(pinLed, OUTPUT);

  // eigener Tab!
  // LCD Monitor bei "I2C" anschliessen (welcher ist egal)
  lcd_start();
}

void loop() {
  long RangeInCentimeters;

  RangeInCentimeters = ultrasonic.MeasureInCentimeters();

  // die LED geht an, wenn man sich innerhalb des Maximalabstands befindet
  if (RangeInCentimeters < maxAbstand) {
    analogWrite(pinLed, 255);
  } else {
    analogWrite(pinLed, 0);
  }

  // eigener Tab!
  // dort auch die Anweisung für die Warnung
  lcd_schleife(RangeInCentimeters);

  //Serial.println(RangeInCentimeters);
  Serial.write((byte)RangeInCentimeters);  // Print variable to serial port

  delay(100);
}

// http://www.seeedstudio.com/wiki/Grove_-_Buzzer
// Buzzer schlägt Alarm
void warnung(int pin) {
  analogWrite(pin, 10);
  delay(analogRead(0));
  analogWrite(pin, 0);
  delay(analogRead(0));
}

// Angaben für den LCD-Screen

#include <Wire.h>
#include "rgb_lcd.h"

rgb_lcd lcd;

const int colorR = 150;
const int colorG = 150;
const int colorB = 150;

void lcd_start() {
  // mehr zum LCD-code: https://github.com/Seeed-Studio/Grove_LCD_RGB_Backlight/

  // set up the LCD's number of columns and rows:
  lcd.begin(16, 2);

  lcd.setRGB(colorR, colorG, colorB);

  // Print a message to the LCD.
  lcd.print("Abstand:");

  delay(1000);
}

void lcd_schleife(long wert) {
  // set the cursor to column 0, line 1
  // (note: line 1 is the second row, since counting begins with 0):

  lcd.setCursor(0, 1);
  lcd.print("        ");

  // Ausgabe des Abstands
  lcd.setCursor(0, 1);
  lcd.print(wert);

  // damit wird "cm" immer direkt hinter dem Wert positioniert
  // auch wenn sich die Länge des Wertes ändert
  String wertAlsString = String(wert);
  int cmPos = wertAlsString.length()+1;

   // Ausgabe der Masseinheit
  lcd.setCursor(cmPos, 1);
  lcd.print("cm");

  // wenn es ziemlich dunkel ist
  // soll das Diplay rot werden
  if (wert > 20) {
    lcd.setRGB(colorR, colorG, colorB);

  } else {
    lcd.setRGB(255, 0, 0);
    warnung(speakerPin);
  }

  delay(100);
}